CO2 Laser Skin Resurfacing Treatments in Lehi, Utah
What is CO2 Laser Skin Resurfacing?
CO2 Laser Resurfacing
Schedule a consultation:
MD Consult
- Ideal for:
- Patients wanting the best of the best
- Complicated, advanced, or non-responsive cases
- Patients who simply prefer a doctor
- CO2 resurfacing, liposuction, surgical alternatives
- Not Ideal for
- Weight loss injections, derm clean ups, facials
Cosmetic Consults
- 30 minute (double length) visit
- Baseline "before" photos
- Advanced Trueskin Age® analysis
- Goal setting & history intake
- Evaluation and treatment plan
- Pricing & education
Nurse Consult
- Ideal for:
- Patients who prioritize price
- Weight loss injections, derm clean ups, facials
- Accessibility
- Not Ideal for:
- Patients who simply prefer a doctor
- CO2 resurfacing, liposuction, surgical alternatives
co2 laser Treatment types
Full
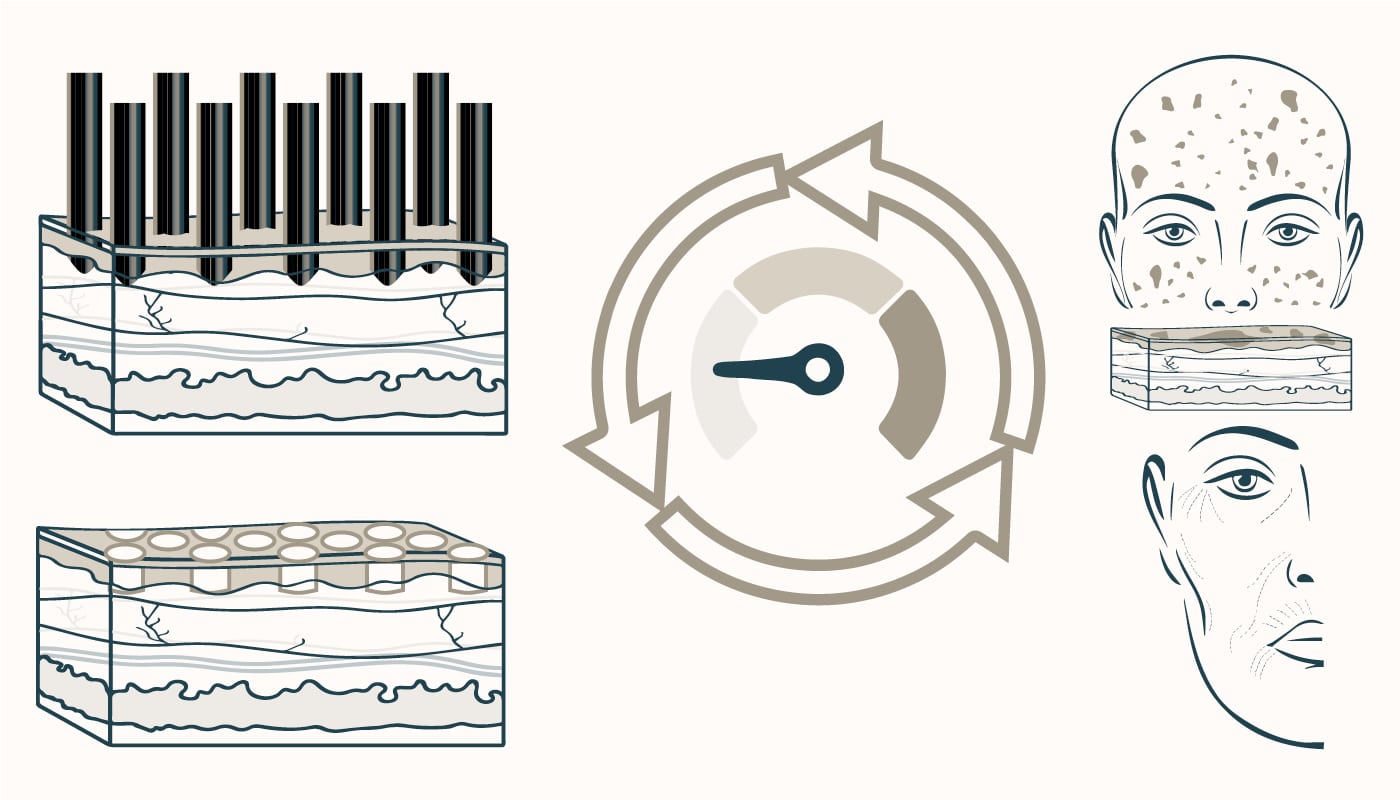
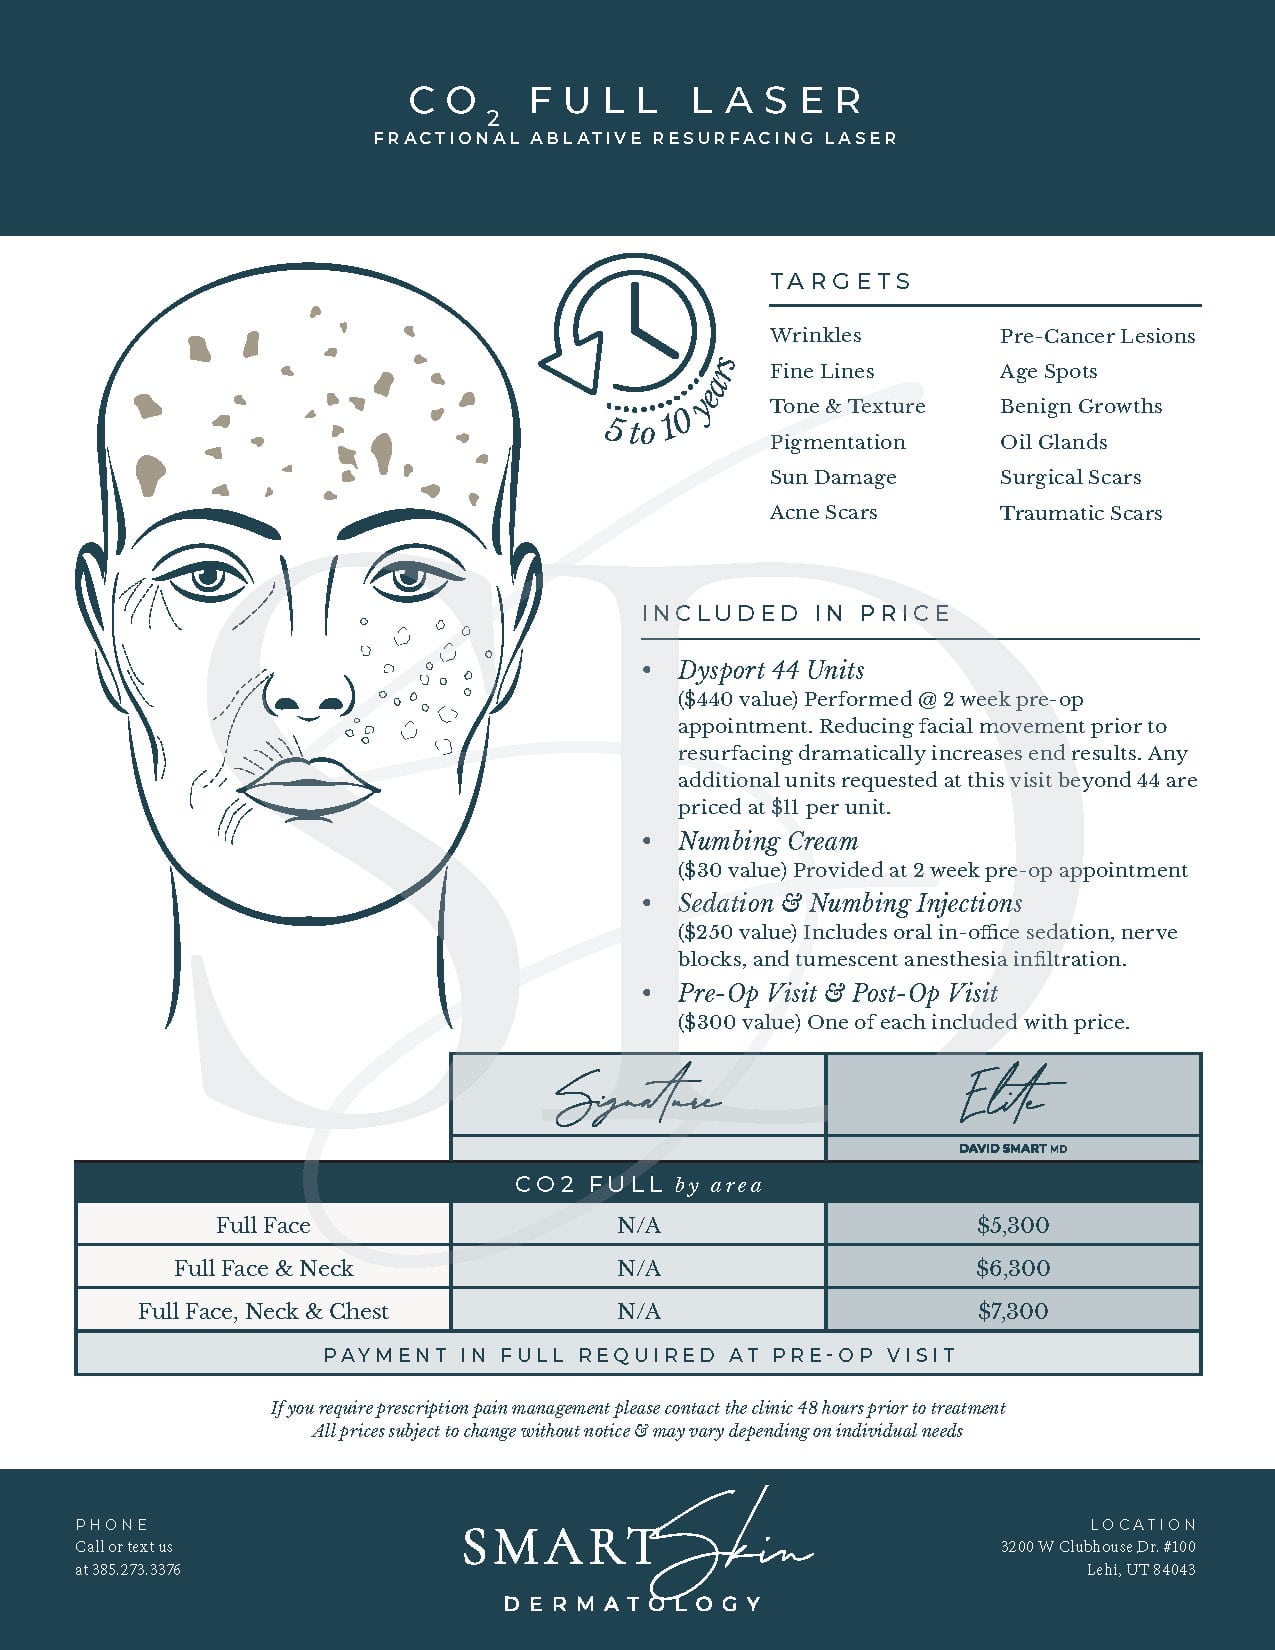
CO2 Full Face Laser Resurfacing
CO2 Full Face Laser Resurfacing
Best and most significant results. This laser treatment requires 1-2 weeks off of work to allow for recovery. Take 5-10 years off your appearance.

Light
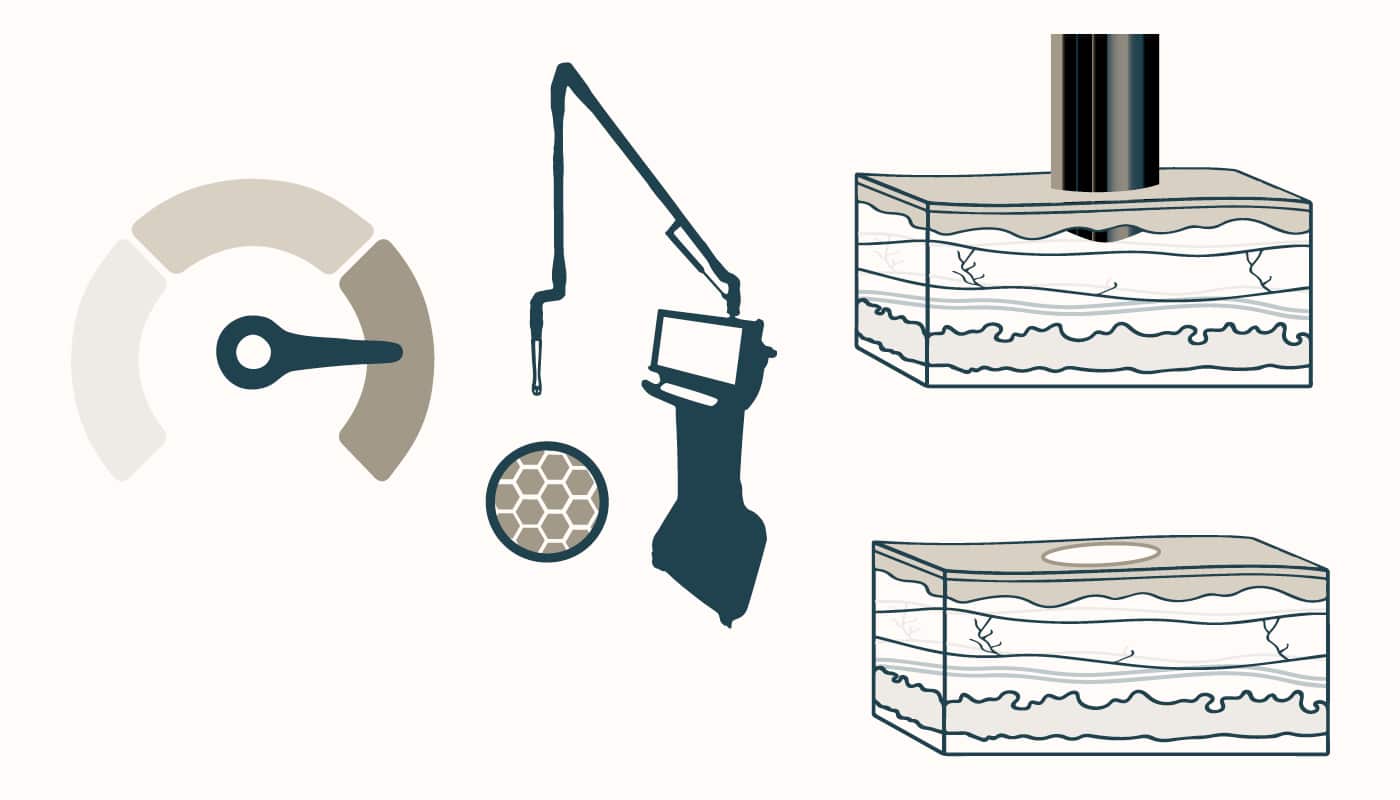
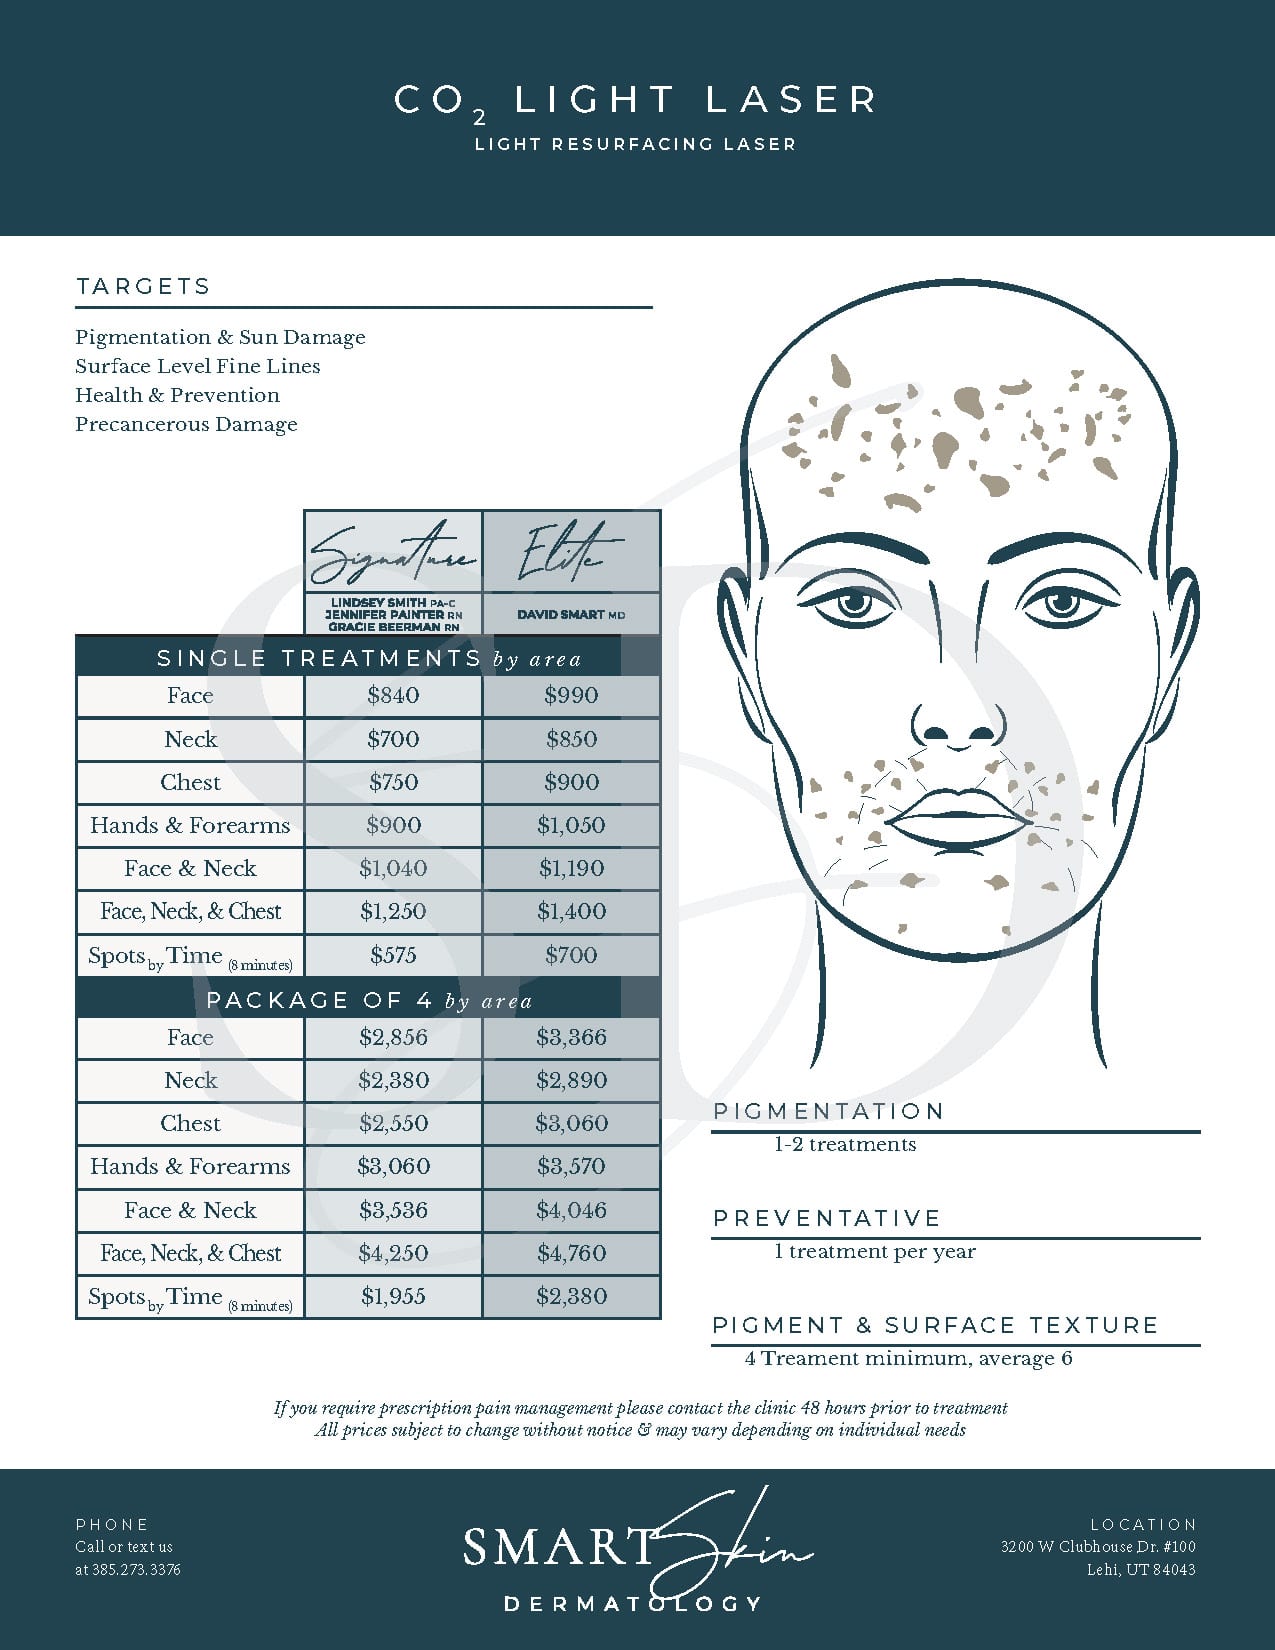
CO2 Light Laser Resurfacing
CO2 Light Laser Resurfacing
We lower the settings and remove our deep collagen setting. This surface resurfacing treatment removes the dedicated downtime. Great for those who want to avoid time off.

Small
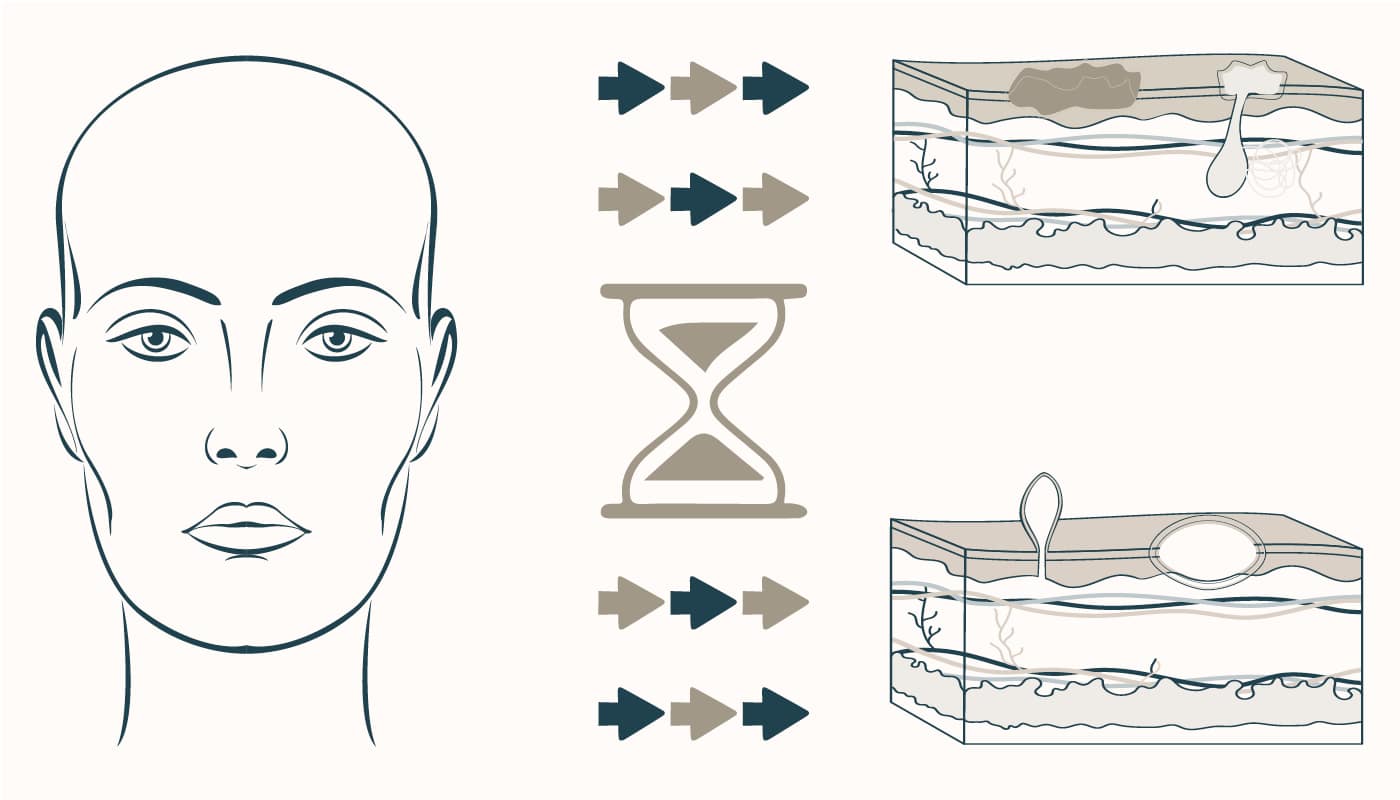
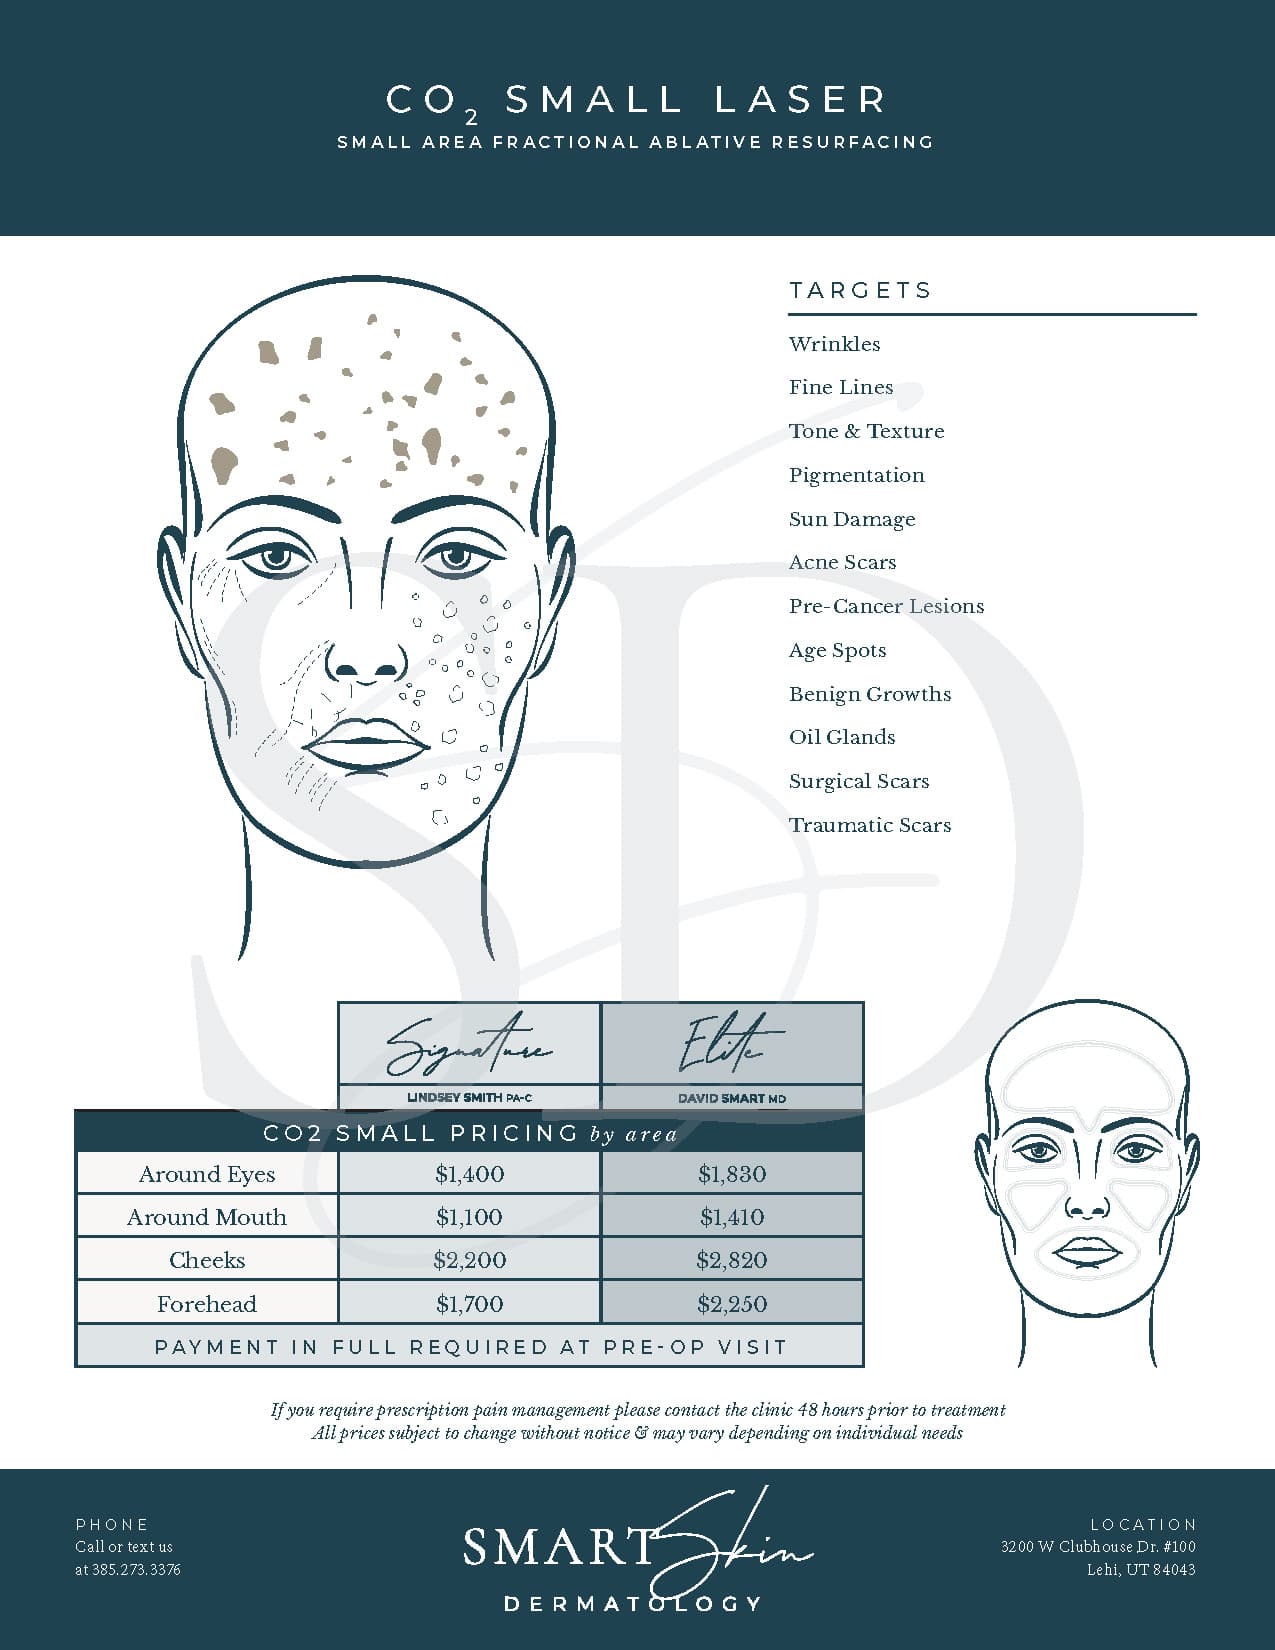
CO2 Small Area Laser Resurfacing
CO2 Small Area Laser Resurfacing
Same as our full option, but for target problem areas only. This laser treatment option requires 1 week off of work to allow for recovery. Great for acne scarring on the cheeks and similar localized concerns.

Spot
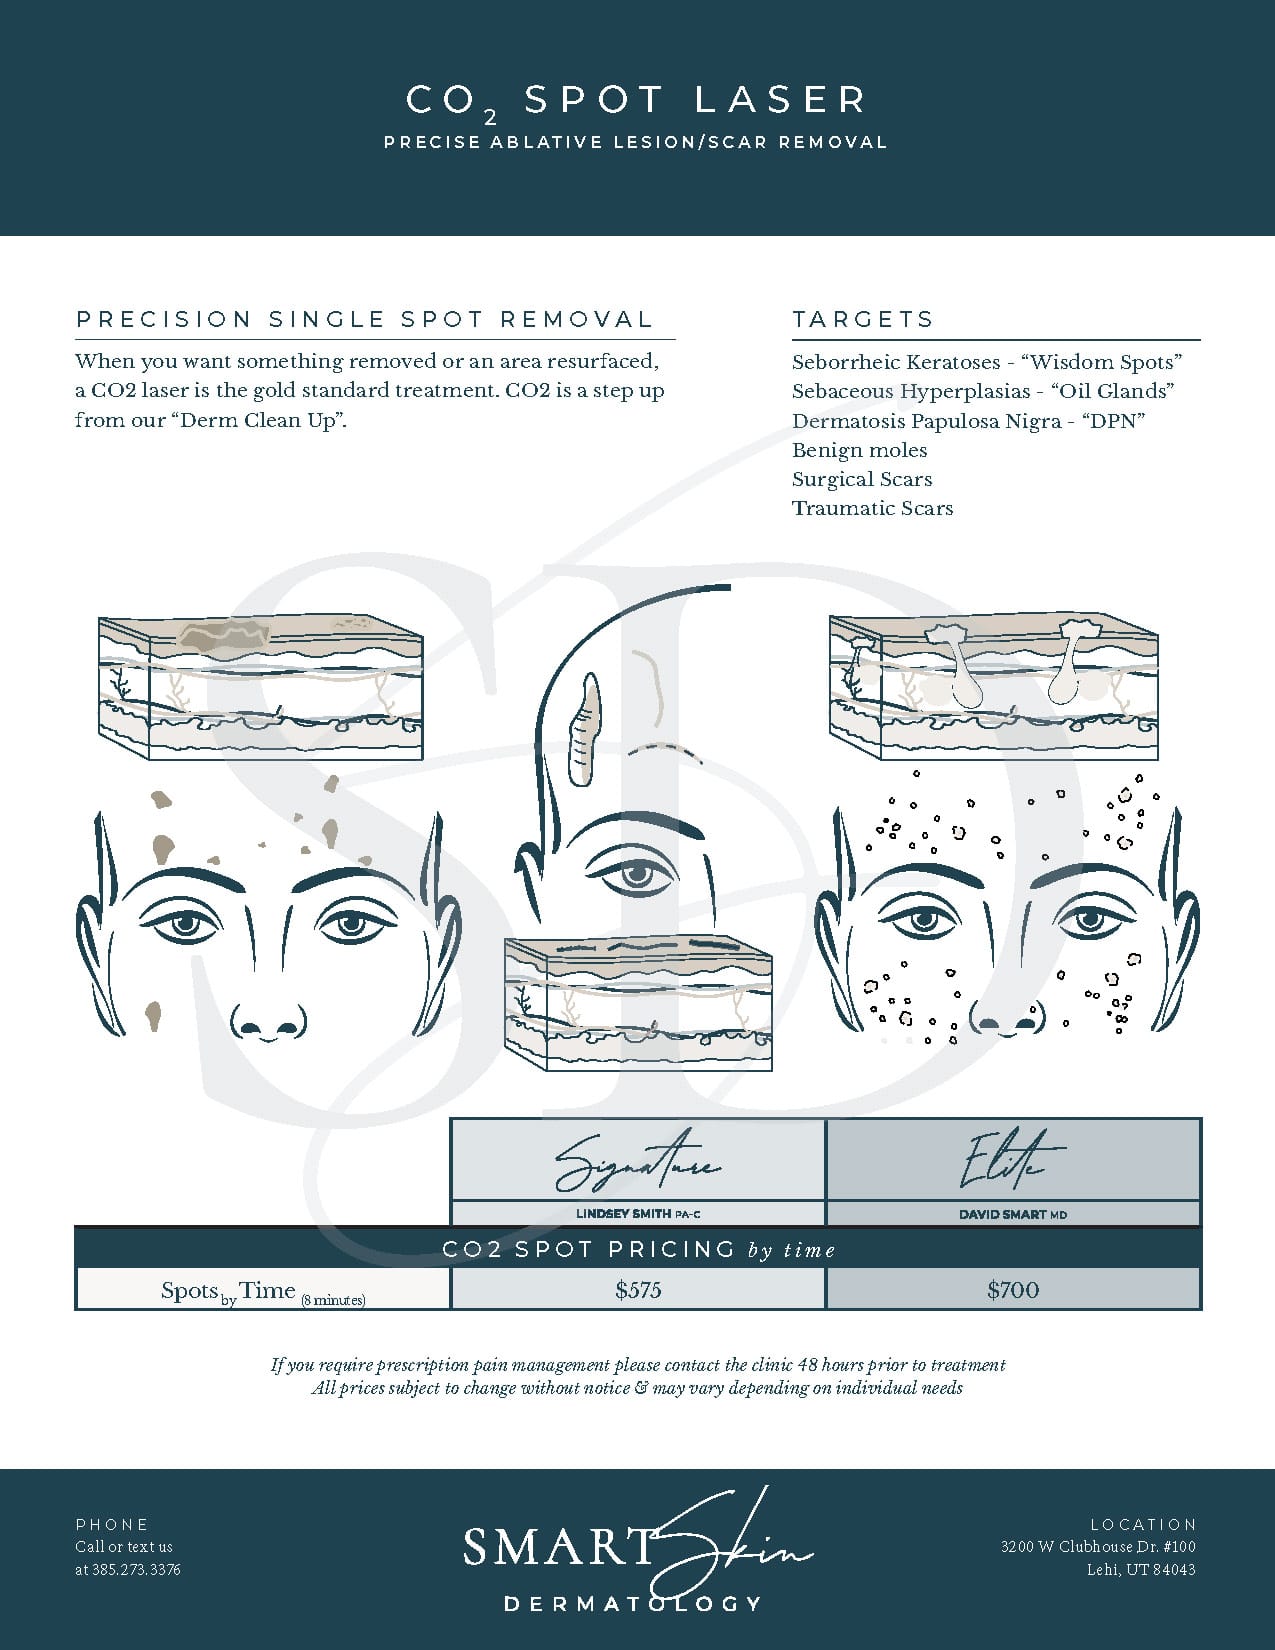
CO2 Spot Laser Removal
CO2 Spot Laser Removal
Less anti-aging, more precise removal. Specialized settings aim to remove specific lesions or erase scars.

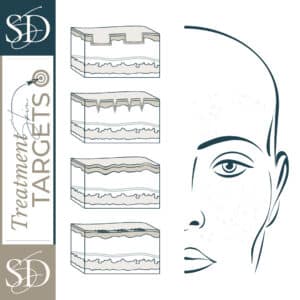
Co2 laser types: How it works
CO2 Full face laser resurfacing
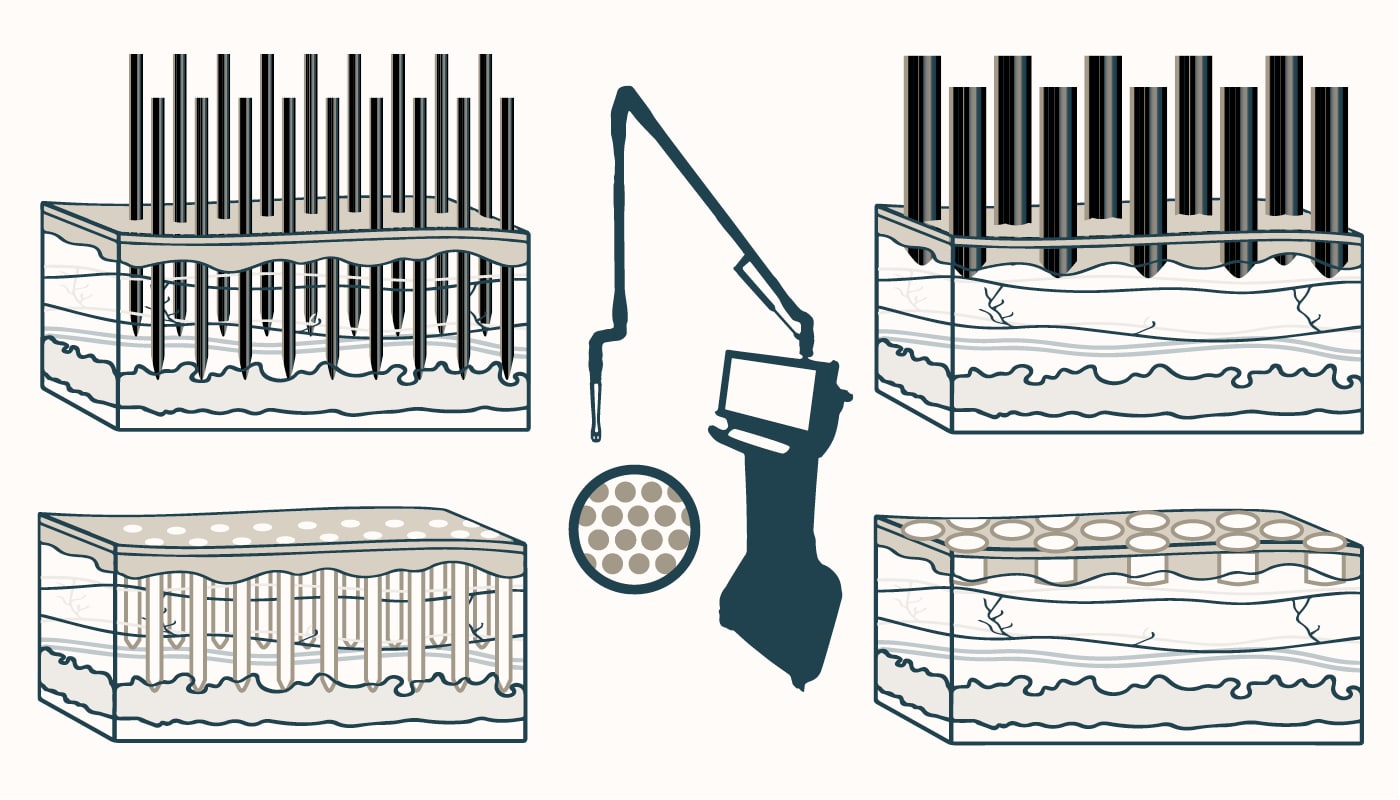
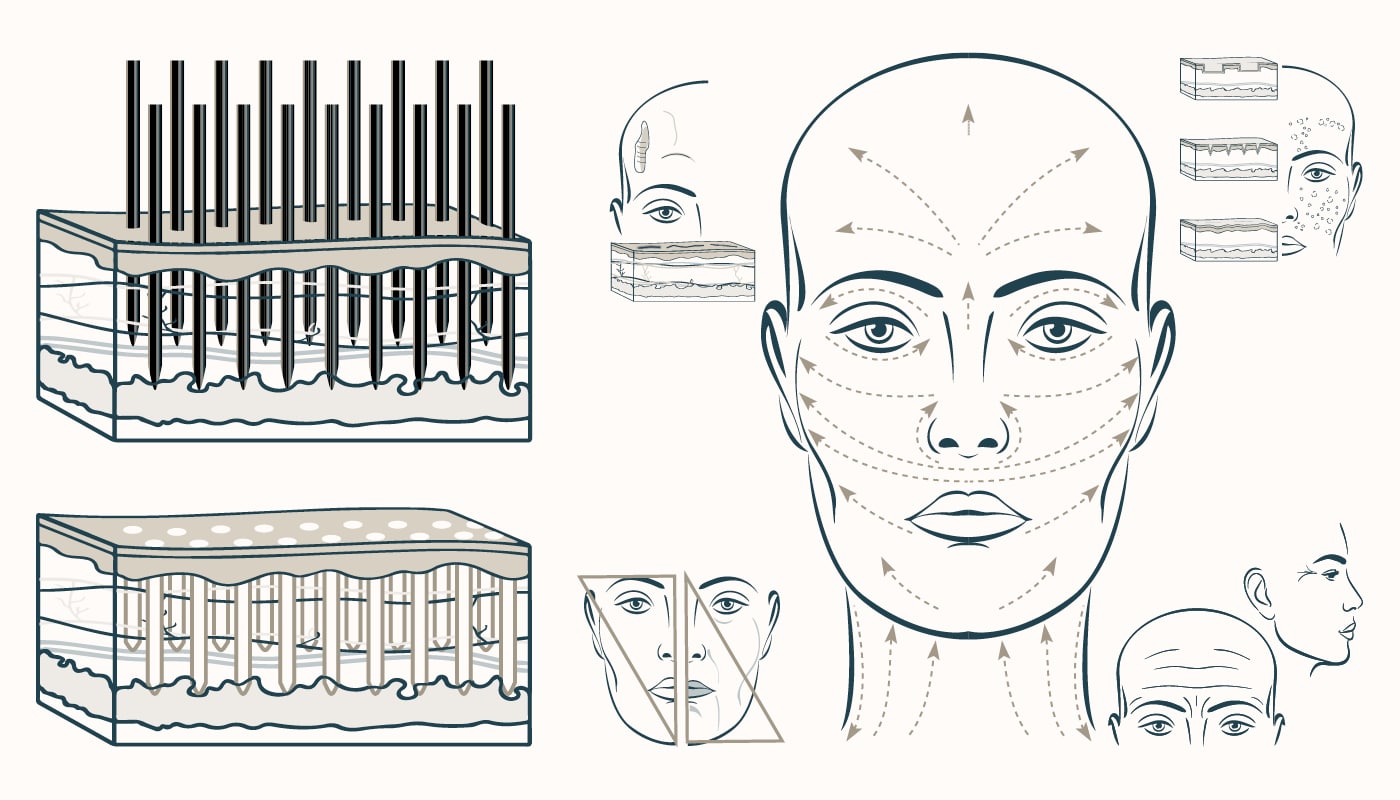
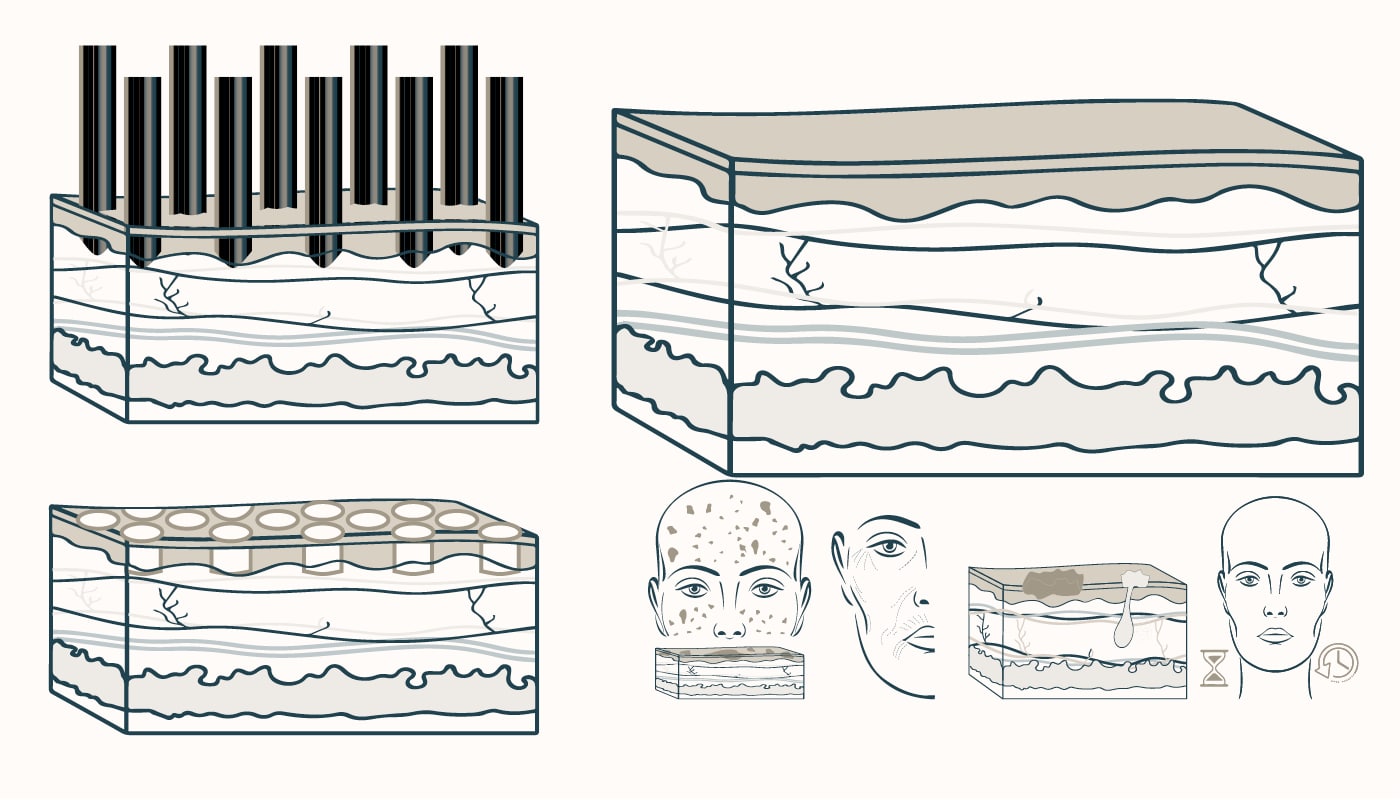
CO2 Small area laser resurfacing
CO2 light laser resurfacing
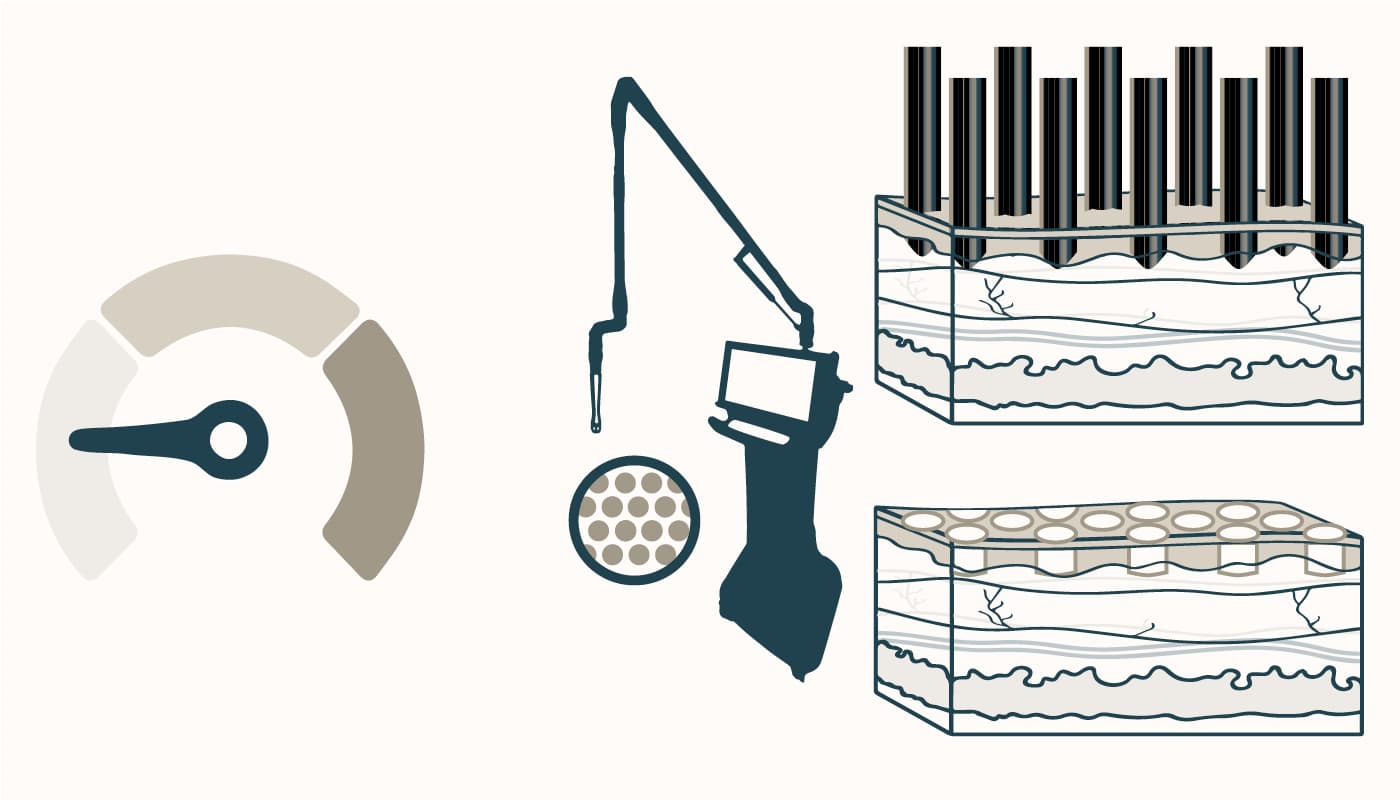
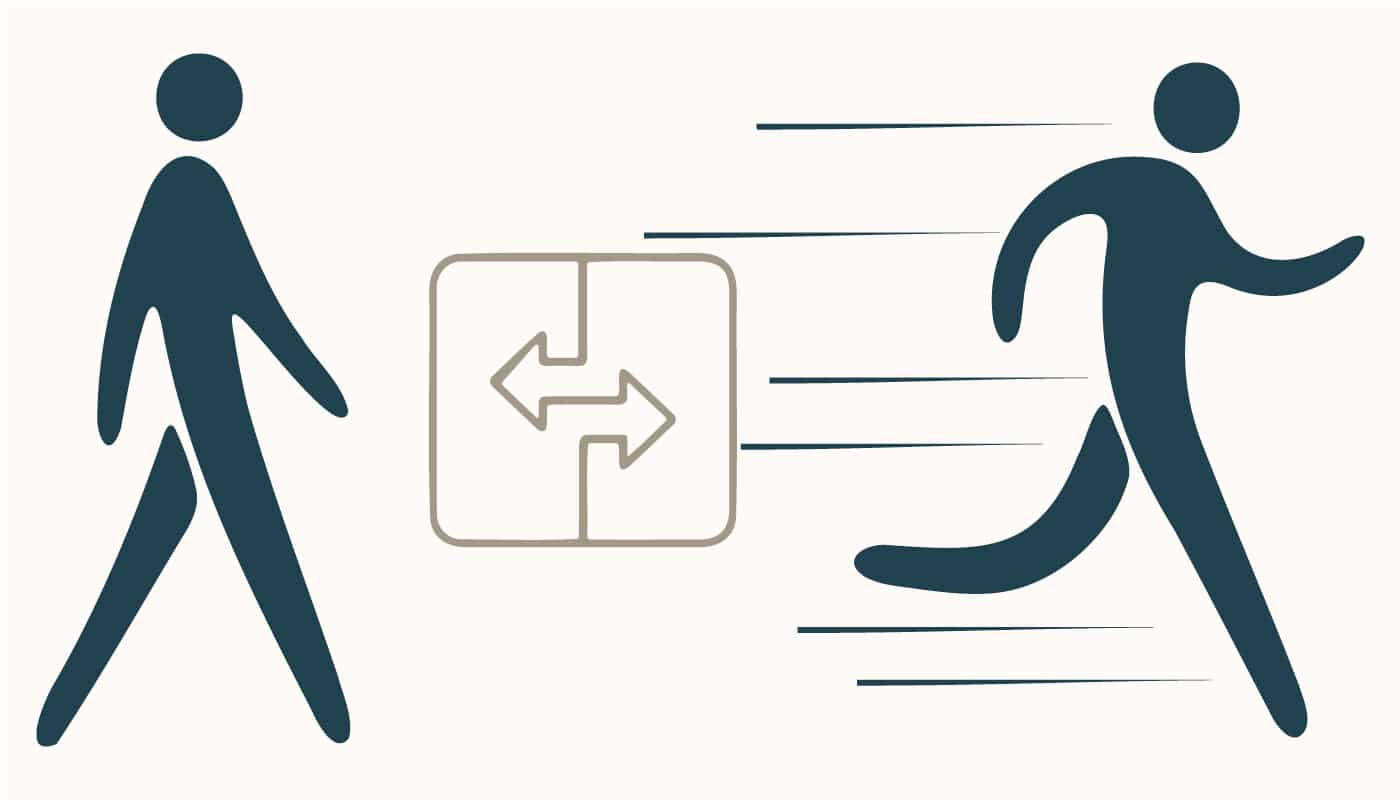
CO2 spot laser resurfacing
CO2 Full face laser resurfacing
CO2 Small area laser resurfacing
CO2 light laser resurfacing
CO2 spot laser resurfacing
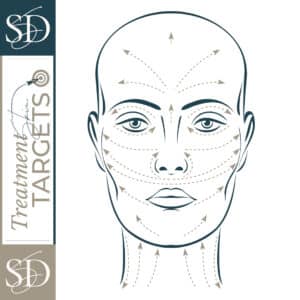
co2 laser Treatment Areas
- Full Face
As the name implies, this is the most common treatment area. We will lightly feather the treatment out under the chin.
- Full Face & Neck
A common addition to any full-face treatment.
- Full Face, Neck & Chest
This is the ultimate treatment for sun-damaged skin. This treatment is a favorite for our dress-wearing patients out there.
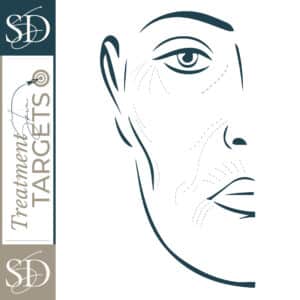
- Cheeks
- Upper boundary: top of cheekbone where the undereye begins.
- Lower boundary: Can vary a little, but typically where dimples would be on the average person.
- Medial boundary: Nose
- Lateral boundary: Can vary a little, but typically between the sideburns and ears.
- Forehead
- Upper boundary: Hairline.
- Lower boundary: eyebrows. Treatment will include the glabella.
- Lateral boundary: Temples
- Around Mouth
- Upper boundary: Nostrils.
- Lower boundary: Central chin at jawline.
- Lateral boundary: Can vary a little, but typically where dimples would be on the average person.
- Medial boundary: Nose.
- Around Eyes
- Upper boundary: Eyebrow.
- Lower boundary: Top of cheekbone.
- Lateral boundary: The sideburn area covering the typical "crow's feet".
- Eyelids are also treated with internal eye shields placed to protect vision.
- Full Face
As the name implies, this is the most common treatment area. We will lightly feather the treatment out under the chin.
- Neck
A common addition to any full-face treatment or as a stand-alone. This extends from the Jawline to the base of the shoulders and collar bones.
- Chest
The chest displays age easily. A common place to forget sunscreen yet always seemingly exposed. This treatment extends from the collar bones to the mid-sternum.
- Hand & Forearms
This is our favorite treatment for solar damage on the arms. You will be surprised by the unbelievable difference this area can make.
We can treat nearly anywhere. Body location does not dictate price*. Like a gameshow, this treatment treats "as many as we can get before time runs out".
"Spots by time" is a 15-minute scheduled appointment with 8 minutes of active laser firing time.
*Note: laser removal of genital lesions carries a surcharge and requires a custom quote.
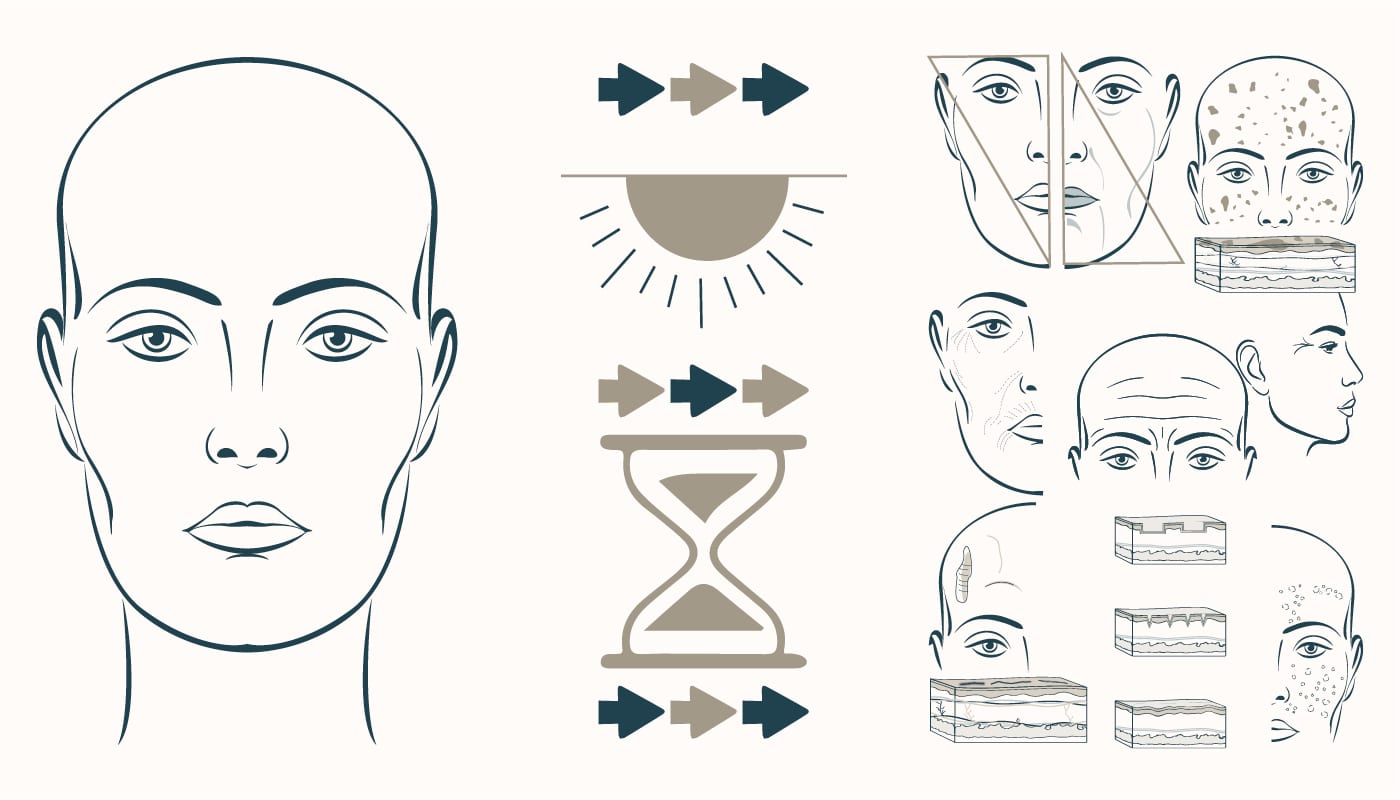
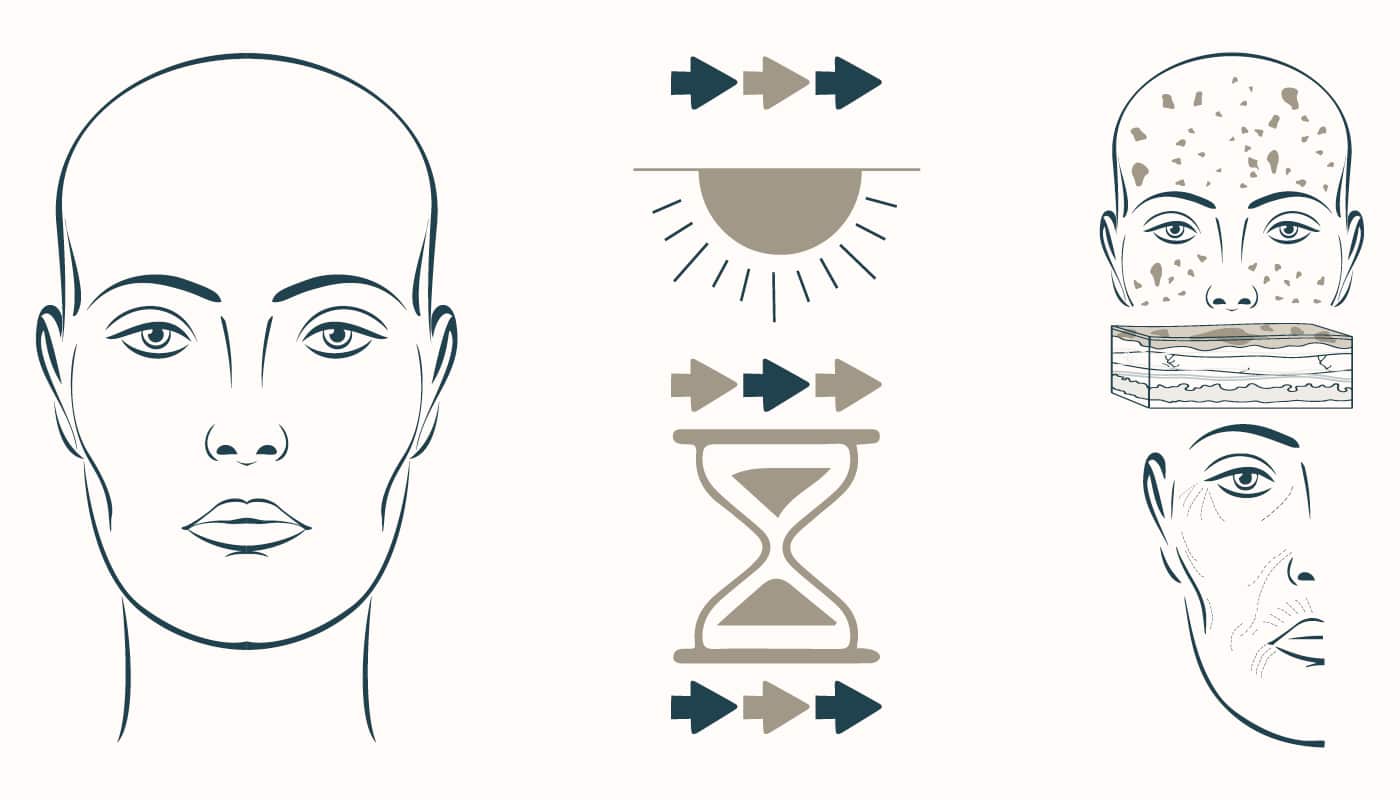
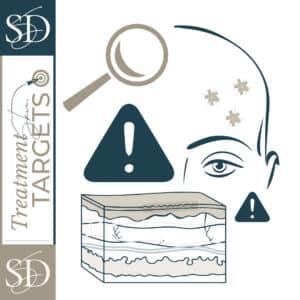
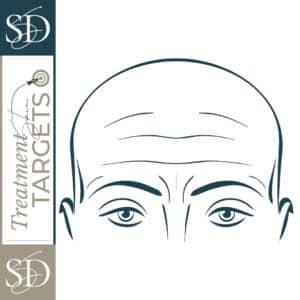
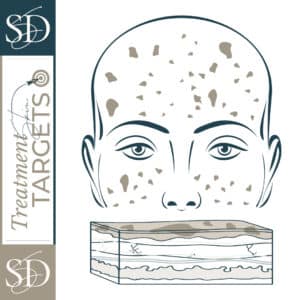
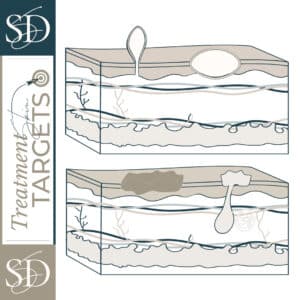
Who is an ideal candidate for CO2 Laser?
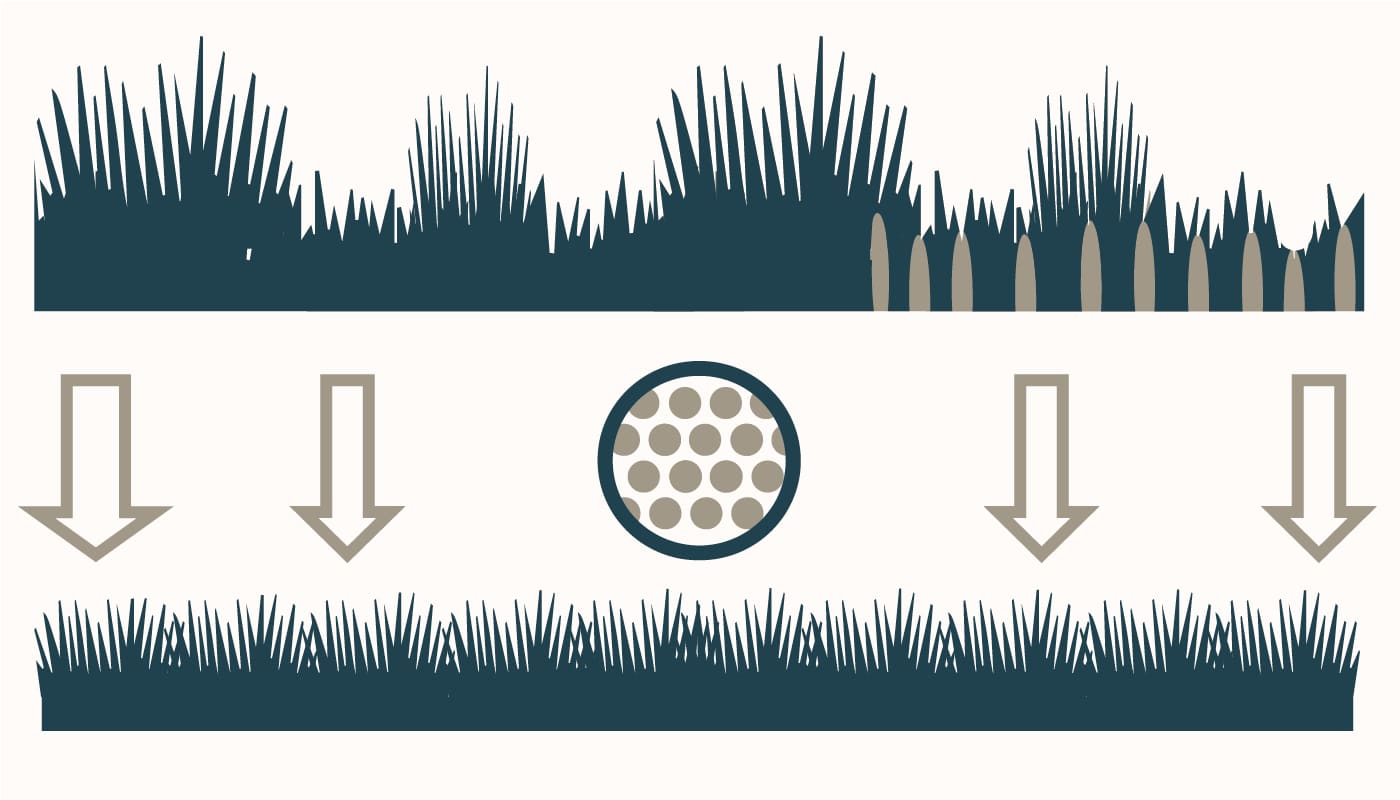
CO2 Laser Treatment targets
CO2 Laser Pricing & Aftercare
Choosing a date:
- Decide on a time of year to have treatment. Considerations below.
- 7-10 days off from work required
- 2 week strict sun avoidance
- 1-month limited sun exposure with strict sun protection when outside.
- 4 weeks prior to any important events.
- You will need an escort to and from your appointment.
Scheduling:
- Contact office at 385-273-3376 and request to speak with the COSMETIC NURSE
- Provide a date range you are hoping for (see considerations above)
- The cosmetic nurse will schedule you.
Payment:
- $500 is required to book an appointment
- The remaining balance is due at the Pre-Op Visit
Visit Layout:
- Pre-op visit. 30-minute visit. Typically 2 weeks (12-18 days) before treatment date.
- Treatment Day. 4-hour scheduled slot.
- Post-Op Visit. 30-minute visit. Typically 3-6 days after treatment day.
- Baseline photos will be taken. Please come without makeup and jewelry.
- Medications will be prescribed at this visit.
- You will receive your numbing cream at this visit.
- You will receive your Dysport treatment at this visit.
- We review treatment expectations, prep, and aftercare at this visit.
2 weeks before treatment:
- Arrange an escort: This person will be assuming responsibility for you and cannot be a bus, taxi, or Uber/Lyft. It’s also helpful to have someone stay with you and assist you for the first night if possible.
- Stop skin irritants 2 weeks before: Examples: Retin-A, retinol, glycolic acid, salicylic acid, Vitamin C, etc.
- Fill prescriptions: Prescriptions will be given at your pre-op visit. Fill these prescriptions before treatment day and pick up Vaniply Ointment.
- Sun Exposure: Try your best to avoid sun exposure as much as reasonably possible.
Day Before treatment:
- Start taking your antiviral (typically valacyclovir) & antibiotic as instructed by your physician.
- Prepare home: Older sheets, pillowcases, and bedding on the bed.
- Prepare vinegar soaks (see vinegar water soaks)
The morning of treatment:
- Eat a light meal.
- Have hair washed, without product, and pulled back from the face. Wash face with gentle cleanser.
- Do not wear makeup. NO MASCARA, EYELINER, OR EYELASH EXTENSIONS.
1 hour before treatment:
- If prescribed, take recommended sedatives, as instructed by your physician.
- For all other medications, take as instructed by your physician.
- Apply numbing cream.
- Washing will be done 3-4 times daily. (breakfast, lunch, dinner, and before bed)
- Adjust water to lukewarm, do not use any hot water during the healing process.
- Wash hands thoroughly.
- Put approximately 4-5 pumps of Gentle Cleanser onto your fingertips, and lightly pat the entire treated area. (NO RUBBING OR SCRUBBING)
- Lean over the sink gather the water from the running tap into your cupped hands and apply gently to treated areas. Repeat 4-5 times.
- Some ointment may remain, or you may feel some “grease”. This is okay.
- Gently press a clean towel to the treated areas and slowly remove.
- You may shower the days following your procedure, but be sure not to allow water to directly hit treated
areas. No hot showers for 2 weeks. Baths are not recommended for 2 weeks. - If you typically shave your face, avoid shaving with a blade for 3 weeks. An electric shaver may be used after 2 weeks.
- What you will need:
- Distilled Water 1 Gallon
- Plain White Vinegar
- Clean spray bottle
- Clean bottle/bowl with lid for storage.
- Mix 1 Cup white vinegar with 1 gallon distilled water.
- Pour into Spray bottle
- Store the spray bottle/bowl and remaining mixture (if any) in the fridge.
Expect:
- EXPECT oozing and bleeding immediately after the treatment.
- EXPECT treated skin will appear to have a pattern of laser marks.
- EXPECT your skin will to be very swollen. This will go down over 48 hours.
Do not:
- DO NOT scratch, pick, or scrape the treatment area. Wear cotton gloves while sleeping if necessary.
- DO NOT let the treatment area dry out (this will lead to scabbing and could lead to scarring).
- DO NOT expose the healing area to the sun. Strict zero sun exposure for 2 weeks.
Watch for:
- WATCH FOR increased redness (some is to be expected).
- WATCH FOR increased pain.
- WATCH FOR increased heat.
- WATCH FOR thick yellow drainage from the wound (clear, light oozing is completely normal and expected).
- WATCH FOR elevated body temperature.
- Apply Vaniply Ointment every 30 to 60 minutes. Do not allow the skin to dry out.
- Use eye drops as necessary, Clear eyes/Refreshed tears are preferred. (ointment can melt into the eye area and cause irritation)
- Cleanse before bed with Gentle Cleanser. (see wash instructions)
- Get up every 2-3 hours during the 2 first nights to reapply ointment.
- Cleanse with Gentle Cleanser 3-4 times a day. (see wash instructions)
- Use a Vinegar Wash spray bottle to gently mist the face. allow to sit for 2-4 minutes, pat dry. (store in fridge)
- Immediately after the vinegar wash, apply a thick layer of Vaniply Ointment.
- Continue to apply Vaniply Ointment 2-3 times as needed until the next face wash.
Further instructions will be provided at your post-op visit.
Choosing a date:
- Decide on a time of year to have treatment. Considerations below.
- 7-10 days off from work required
- 2 week strict sun avoidance
- 1-month limited sun exposure with strict sun protection when outside.
- 4 weeks prior to any important events.
- You will need an escort to and from your appointment.
Scheduling:
- Contact office at 385-273-3376 and request to speak with the COSMETIC NURSE
- Provide a date range you are hoping for (see considerations above)
- The cosmetic nurse will schedule you.
Payment:
- $500 is required to book an appointment
- The remaining balance is due at the Pre-Op Visit
Visit Layout:
- Pre-op visit. 30-minute visit. Typically 2 weeks (12-18 days) before treatment date.
- Provider may opt to
do all pre-op items at initial consultation dependant on multiple factors.
- Provider may opt to
- Treatment Day. 4-hour scheduled slot.
- Post-Op Visit. 30-minute visit. Typically 3-6 days after treatment day.
- Baseline photos will be taken. Please come without makeup and jewelry.
- Medications will be prescribed at this visit.
- You will receive your numbing cream at this visit.
- We review treatment expectations, prep, and aftercare at this visit.
2 weeks before treatment:
- Arrange an escort: This person will be assuming responsibility for you and cannot be a bus, taxi, or Uber/Lyft. It’s also helpful to have someone stay with you and assist you for the first night if possible.
- Stop skin irritants 2 weeks before: Examples: Retin-A, retinol, glycolic acid, salicylic acid, Vitamin C, etc.
- Fill prescriptions: Prescriptions will be given at your pre-op visit. Fill these prescriptions before treatment day and pick up Vaniply Ointment.
- Sun Exposure: Try your best to avoid sun exposure as much as reasonably possible.
Day Before treatment:
- Start taking your antiviral (typically valacyclovir) & antibiotic as instructed by your physician.
- Prepare home: Older sheets, pillowcases, and bedding on the bed.
- Prepare vinegar soaks (see vinegar water soaks)
The morning of treatment:
- Eat a light meal.
- Have hair washed, without product, and pulled back from the face. Wash face with gentle cleanser.
- Do not wear makeup. NO MASCARA, EYELINER, OR EYELASH EXTENSIONS.
1 hour before treatment:
- If prescribed, take recommended sedatives, as instructed by your physician.
- For all other medications, take as instructed by your physician.
- Apply numbing cream.
- Washing will be done 3-4 times daily. (breakfast, lunch, dinner, and before bed)
- Adjust water to lukewarm, do not use any hot water during the healing process.
- Wash hands thoroughly.
- Put approximately 4-5 pumps of Gentle Cleanser onto your fingertips, and lightly pat the entire treated area. (NO RUBBING OR SCRUBBING)
- Lean over the sink gather the water from the running tap into your cupped hands and apply gently to treated areas. Repeat 4-5 times.
- Some ointment may remain, or you may feel some “grease”. This is okay.
- Gently press a clean towel to the treated areas and slowly remove.
- You may shower the days following your procedure, but be sure not to allow water to directly hit treated
areas. No hot showers for 2 weeks. Baths are not recommended for 2 weeks. - If you typically shave your face, avoid shaving with a blade for 3 weeks. An electric shaver may be used after 2 weeks.
- What you will need:
- Distilled Water 1 Gallon
- Plain White Vinegar
- Clean spray bottle
- Clean bottle/bowl with lid for storage.
- Mix 1 Cup white vinegar with 1 gallon distilled water.
- Pour into Spray bottle
- Store the spray bottle/bowl and remaining mixture (if any) in the fridge.
Expect:
- EXPECT oozing and bleeding immediately after the treatment.
- EXPECT treated skin will appear to have a pattern of laser marks.
- EXPECT your skin will to be very swollen. This will go down over 48 hours.
Do not:
- DO NOT scratch, pick, or scrape the treatment area. Wear cotton gloves while sleeping if necessary.
- DO NOT let the treatment area dry out (this will lead to scabbing and could lead to scarring).
- DO NOT expose the healing area to the sun. Strict zero sun exposure for 2 weeks.
Watch for:
- WATCH FOR increased redness (some is to be expected).
- WATCH FOR increased pain.
- WATCH FOR increased heat.
- WATCH FOR thick yellow drainage from the wound (clear, light oozing is completely normal and expected).
- WATCH FOR elevated body temperature.
- Apply Vaniply Ointment every 30 to 60 minutes. Do not allow the skin to dry out.
- Use eye drops as necessary, Clear eyes/Refreshed tears are preferred. (ointment can melt into the eye area and cause irritation)
- Cleanse before bed with Gentle Cleanser. (see wash instructions)
- Get up every 2-3 hours during the 2 first nights to reapply ointment.
- Cleanse with Gentle Cleanser 3-4 times a day. (see wash instructions)
- Use a Vinegar Wash spray bottle to gently mist the face. allow to sit for 2-4 minutes, pat dry. (store in fridge)
- Immediately after the vinegar wash, apply a thick layer of Vaniply Ointment.
- Continue to apply Vaniply Ointment 2-3 times as needed until the next face wash.
Further instructions will be provided at your post-op visit.
-
Sun Avoidance: This is important leading up to your treatment. We cannot treat patients who have an active sunburn or have too much recent sun exposure.
-
Numbing Cream: A good layer of numbing cream should be applied to the treatment area 60-90 minutes prior to treatment.
-
Valtrex: Let us know if you have a history of cold sores. Patients should be on a preventative five-day course of anti-viral medication that starts the day before your treatment to avoid a cold sore break out.
-
Bleaching Cream: Many patients will be prescribed some form of a bleaching regimen prior to their laser treatment. Use as directed by your provider leading up to appointment.
-
Post Procedure: Skin will be red and feel very hot, much like a bad sunburn. Wet wash cloths or ice packs will be provided directly after procedure to help with the burning sensation. Heat fades over 2 - 24 hours.
-
Day 1: Skin will be very dry. Moisturizing and icing are key. An ointment moisturizer is best during the first few days. Ice in 15 minute on, 15 minute off, intervals over the first 24 hours will help with redness and heat.
-
Day 2-3: Expect all dark spots on your face to grow darker in appearance. Some slight redness and swelling can persist into this time (continued icing will help). Continue moisturizing with ointment based moisturizer.
-
Day 4-5: Your brown spots can develop a “coffee grounds” appearance and texture, this is normal. Do not scrub or pick at them, as they will fall off naturally. A powder based foundation is preferred during this time, if makeup is worn, due to the textural appearance of skin. Transition to a gentle cream based moisturizer.
-
Day 6-7: Most brown spots will have faded by this time. Any remaining brown spots will continue to slough off. Some very light & gentle exfoliation with a damp wash cloth can now help, but DO NOT PICK.
-
General Aftercare: Avoid exposure to the sun for 1 week.Avoid any irritants or bleaching agents for 2 weeks after your treatment. Any discomfort you may have (usually not lasting more than a few hours, if any) can be relieved with acetaminophen (Tylenol) or ibuprofen.
-
The overall goal of caring for these spots will be to avoid any crusting or scabbing. Crusting and scabbing can lead to delayed and suboptimal healing.
-
Moisturize with ointment. A layer of ointment should be on treated areas at all times until they have healed.
-
Examples include Vaseline, Aquaphor, and Vaniply Ointment. Do not allow areas to dry out.
-
Cover Areas if Possible. Band-Aids can also help keep the area moist and clean. A layer of ointment should be covered with a Band-Aid when possible. If there are too many spots or the size makes covering difficult, then ointment should be applied at more frequent intervals.
-
A gentle cleanser may be used to wash area while bathing but avoid any rubbing or scrubbing. Pat dry.
-
Vinegar Water Soaks. These will help break up any crusting that may be forming and also kill harmful bacteria. They can be performed anywhere from 2-4 times a day. See instructions below.
-
Makeup. It is recommended to wait until spots have healed over before applying base or foundation makeup directly over the spots. Makeup can be applied around spots while healing.
-
Transition to regular facial moisturizer once treated spots have healed over and are no longer able to crust or scab.
-
Mix 1 tablespoon white vinegar with 1 quart water. Can store in fridge between uses.
-
Soak a cotton cloth or guaze in the solution.
-
Wring out cloth and apply to area for roughly 15 mnutes.
-
Never double dip cloth into mixed solution.
-
Repeat 2-4 times per day.
-
Click here for the complete vinegar water soak instructions.

Similar treatments on the market:
Full-Face Resurfacing:
- Fraxel or Frax lasers. Also known as erbium thulium lasers. They are typically called the “CO2’s little brother”. They are great devices and offer great results but typically they require 6 treatments or more to accomplish what a full face CO2 can offer.
- Deep chemical peels such as a phenol peel. These have mostly been phased out. They offer results that are almost identical to a CO2 laser, however they have a much higher-risk profile and are more prone to complications and scarring.
- Microneedling. This would be a small step down from the Fraxel laser treatment mentioned above. When addressing acne scars, it is a great complement to a CO2 treatment.
- Facelift. These are two entirely different treatments that are commonly mixed up. A facelift lifts the face. A CO2 treatment produces more collagen and improves the tone, texture, and/or pigmentation of the skin. As you can see, they do different things. A facelift without a CO2 laser will leave the person with the same quality of skin they had going in with no improvement to tone, texture, or pigmentation.
Spot Treatment:
- Cautery. For the burning off or removal of stubborn lesions. This is a good alternative but is not nearly as precise.
- Cryotherapy. Freezing of lesions is very effective for their removal, however we typically view this as a medical dermatology procedure and never a cosmetic one. With cryotherapy the patient will almost end up with a small hypopigmented scar in its place. In cosmetic dermatology we want to avoid a scar all together.
CO2 Laser Possible Side Effects:
- Redness & swelling
- Discomfort or burning sensation
- Crusting
- Dryness & itching
- (rare) infection, hyperpigmentation, hypopigmentation, scarring and corneal injury
Why choose us for your CO2 Laser treatment

-

Expectations & downtime
More dramatic and yes, best results come with downtime. This is the trade-off we balance every day in aesthetic medicine. We will take the time to give you the truth and find the right treatment for YOU.
-
No one does CO2 like we do
CO2 results range from good to, “Wow, I look 10 years younger!” We prefer the latter. We have developed a protocol that includes pre-treatment neurotoxin and post-treatment skincare to get you the best results possible. This protocol took 5 years and hundreds of patients to create.
-
Dermatologists are the best
We know everything there is to know about skin. This allows us to go beyond what can be achieved at a spa or plastic surgeon’s office, to give you the best recommendations to meet your goals.
-
Transparency
We want patients for life, not for one round of treatment. This means we won’t sell you on hopes and dreams. Seeking out cosmetic intervention is hard enough without the car salesman approach.
-
Comprehensive technologies
We want patients for life, not for one round of treatment. This means we won’t sell you on hopes and dreams. Seeking out cosmetic intervention is hard enough without the car salesman approach.

CO2 Laser Scheduling options
New Patients or Existing Medical New to Cosmetics
Schedule a Consult

For new patients or existing medical patients. To discuss CO2 laser treatment and other cosmetic topics.
Returning Cosmetic Patients
Schedule a Treament
If you have had a consult in the past or have had this treatment before.
Not sure?
Call or text us! Our cosmetic nurses are standing by and ready to answer your questions.
CO2 LASER FAQ
How much downtime is involved for a full-face CO2 resurfacing?
Full-face resurfacing requires a minimum of 7-10 days of healing. We typically recommend patients take 10 to 14 days away from work or other activities while healing.